Modify a linux LiveOS
By default I’m using GRML when I need a live operating system. I installed it to one of my USB pen drives and (almost) always carry it with me. GRML already has most of the essential and nice-to-have tools installed and it’s super compfortable when the shit has hit the fan!
The Problem
However, there are circumstances when you need something that’s not available on the base image. That entails a bit annoying work. For example if you need to install package XXX you need to
- run
aptitude install XXX - recognize that the package lists are super out-dated…
- call
aptitude update - recognize you’re missing the latest GPG key that was used to sign the packages
- run a
gpg --keyserver keys.gnupg.net --recv YYYfollowed by agpg --export YYY | sudo apt-key add - - run
aptitude install XXXagain to get the package
And that’s actually really annoying if you nedd XXX often. You’ll wish to have XXX in the base system! But how to get it there?
Update the ISO image
The following will be based on GRML. I assume that your USB pen drive will be recognized as /dev/sdX and the partition you (will) have created is /dev/sdX1. The following also requires syslinux to be installed:
aptitude install syslinuxInstall the original Image to your Pen Drive
To modify an image you first need the image. So go to grml.org/download/ and download the latest version of the image. At the time of writing this article it is Grml 2014.11 (Gschistigschasti). You see it’s a bit outdated, wich also explains this article ;-)
To install it on a pen drive you need a pen drive. It should have a partition with a bootable flag. Use, eg., fdisk or gparted.
This partition should have a FAT partition on it. If your not using the UI of gparted this is the way to go (assuming /dev/sdX1 is the partition you created):
mkfs.fat -F32 -v -I -n "LIVE" /dev/sdX1Then you need to install syslinux’ MBR onto the pen drive:
dd if=/usr/lib/syslinux/mbr/mbr.bin of=/dev/sdXMount both, the ISO (/tmp/grml96-full_2014.11.iso) and the pen drive (/dev/sdX1) to copy all files from the ISO onto the pen drive:
mkdir -p /mnt/mountain/{iso,usb}
mount /dev/sdX1 /mnt/mountain/usb
mount -o loop,ro -t iso9660 /tmp/grml96-full_2014.11.iso /mnt/mountain/iso
rsync -av /mnt/mountain/iso/* /mnt/mountain/usb/
If you now have a look into the /mnt/mountain/usb/ directory you will see the GRML live image structure. However, you won’t be able to boot – you still need a proper bootloader.
Fortunately, the syslinux tool is able to install it to your pen drive:
syslinux /dev/sdX1The syslinux bootloader still need some configuration, but GRML alreay contains them. Just copy them from the USB’s/boot/isolinux/ into the root of the pen drive:
cp /mnt/mountain/usb/boot/isolinux/* /mnt/mountain/usbExcellent! Unmount the pendrive an try to boot from it, to make sure it’s properly booting the GRML operating system:
umount /mnt/mountain/iso/ /mnt/mountain/usb/ && syncUnderstand what happens
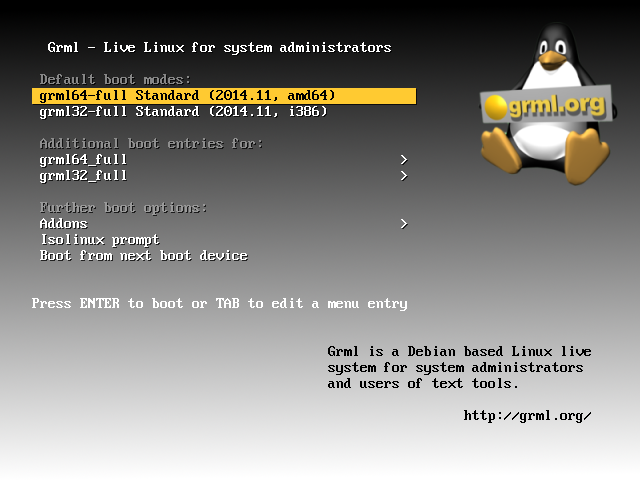
Ok, if that was successful you’re mashine will boot into the GRML splash screen (see Figure) and you can choose between the 64bit and the 32bit version (and some more specific boot options). Clicking either of them will mount a read-only file system from the pen drive as a read-write file system into your RAM. Afterwards it will boot from that sytem in the RAM.
The file system that’s written to the memory can be found in live/grml64-full/grml64-full.squashfs (or /mnt/mountain/usb/live/grml32-full/grml32-full.squashfs for 32bit systems).
It’s a squashfs, see wikipedia on SquashFS.
Modify the Base Image
So let’s go and modify the system.
You probably alreay guess it: We need to update the grml64-full.squashfs and integrate the desired changes.
As I said, the image of the file system can be found in /live/grml64-full/grml64-full.squashfs and /live/grml32-full/grml32-full.squashfs of the USB’s root.
In the following I will just use the 64bit version in /live/grml64-full/grml64-full.squashfs, but it can be applied to the 32bit version euqivalently – just update the paths.
As the SquashFS is read-only you need to mount it and copy all the data to a location on a read-write file system.
To copy the stuff preserving all attributes I recommend using the rsync tool.
Let’s assume your pen drive is again mounted to /mnt/mountain/usb and /storage/modified-livecd is mounted as RW:
mount /mnt/mountain/usb/live/grml64-full/grml64-full.squashfs /mnt/mountain/iso -t squashfs -o loop
rsync -av /mnt/mountain/iso/* /storage/modified-livecd/
Now you have your system read-write in /storage/modified-livecd. Go ahead and modify it! For example, create a new file:
echo "this was not here before" > /storage/modified-livecd/NEWFILEThen you just need to delete the original SquashFS file and repack the new version onto the pen drive:
rm /mnt/mountain/usb/live/grml64-full/grml64-full.squashfs
mksquashfs /storage/modified-livecd /mnt/mountain/usb/live/grml64-full/grml64-full.squashfs
Voilà… Just boot from the pen drive and find your modified live image :)
Of course you can also chroot into /storage/modified-livecd to e.g. install packages and modify it from inside…
For those not familiar with chrooting: [Wikipedia comes with a good example on how to chroot.](https://en.wikipedia.org/wiki/Chroot#Linux_host_kernel_virtual_file_systems_and_configuration_files
So… Conclusion?
Yeah, it’s not that hard to modify the system, but it takes some manual steps. And if you plan to do it more often you need to think about infrastructure etc. Thus, this is probably just applicable for hard-core users – but those will love it ;-)

Leave a comment
There are multiple options to leave a comment: