binfalse
Thunar's volatile default application
June 27th, 2019![Xfce project [GPL (http://www.gnu.org/licenses/gpl.html)], via Wikimedia Commons](https://commons.wikimedia.org/wiki/File:Thunar.svg)
Thunar (Xfce’s file manager) has a rather unintuitive behaviour to select the default app:
For some file types it seems that chossing a program of the context menu’s “Open With…” overwrites the default application for that file type…
That means, once I open a PNG file with Gimp, Gimp becomes the default for PNGs and double clicking the next PNG will result in a >300 ms delay to launch Gimp.
Strangely, that only happens for some file types. Others seem to be invariant to the open-with-selection…?
Anyway, bugged me enough to finally look into it..
It seems, that this was a design decision whithin the Xfce project: If you actively selected a default application it will stay the default application, even if you temporarily open-with another application. If you did not actively select a default application, the last application will be used by default -> this is my annoying use case.
At least, I now know what is needed to do: Actively select a default applications…
You can do it using the UI by right-clicking a file of the type and selecting Open With Other Application…. Then select the desired application and make sure you tick Use as default for this kind of file. From then on, this will be your default application, until you actively change it.
That may be a good solution for many of you, but it’s also pretty tedious to find and right-click all the different file types. And of course it’s not the way I’m working. There must be a nicer option - and there is!
The configuration for Thunar’s mime type bindings is stored in
~/.config/mimeapps.list :)
This file contains two sections:
[Added Associations]contains a list of known file types and possible associations to applications[Default Applications]is a list of file types and … their default application…
Thus, to add another default-application-association, you just need to append another line to the [Default Applications] section. You may just copy a line from the [Added Associations] and reduce the number of applications to one, eg. for PNG images:
[Added Associations]
image/png=eom.desktop;eog.desktop;gimp.desktop
...

[Default Applications]
image/png=eog.desktop
If your desired application is not yet int the list of Added Associations, you may find it in /usr/share/applications/.
If you still cannot find an application, you can generate a new one.
Just create a file ~/.local/share/applications/YOURAPP.desktop containing something like this:
[Desktop Entry]
Encoding=UTF-8
Version=1.0
Type=Application
NoDisplay=true
Exec="/PATH/TO/YOUR/APPLICATION" %f
Name="YOURAPP"
Comment="YOURAPP COMMENT"
Afterwards, you can use YOURAPP.desktop in ~/.config/mimeapps.list.
Looks like I’m often in trouble with default applications…? Is it just me?
If you have problems with KDE applications, you may want to look into my article on KDE file type actions
apt-cacher-ng versus apt-transport-https
May 13th, 2019The headline sounds pretty technical, and so is the topic. Let’s quickly introduce both antagonists:
-
apt-cacher-ngis a tool to cache packages of the apt ecosystem. As an administrator, you may have multiple Debian-based systems. The overlap of packages that all the systems need is typically huge. That means, hundreds of your systems will require the latest security update forcurlat around the same time. Running anapt-cacher-ngserver in your local environment will take a bit heat off Debian’s infrastructure and improves the download speed of packages. See also the Apt-Cacher NG project page. -
apt-transport-httpsis an apt module to obtain packages over a securehttps://connection. Traditionally, packages are downloaded through plain HTTP or FTP, but as these are unencrypted a third party may observe what you’re doing at a repository (which packages you’re downloading etc..). Please note, thatapt-transport-httpsis already integrated in latest versions of apt - no need to install it separately.
So basically, both apt-cacher-ng and apt-transport-https do a good thing! But… They don’t really like each other.. At least by default. However, I’ll show you how to make them behave ;-)
The Problem
The issue is perfectly obvious: You want apt-cacher-ng to cache TLS encrypted traffic…? That won’t happen.
The Solution
You need to tell the client to create an unencrypted connection to the cache server, and then the cache server can connect to the repository through TLS.
Example
Let me explain that using Docker.
To properly install Docker on a Debian based system, you would add a file /etc/apt/sources.list.d/docker.list containing a repository such as:
deb [arch=amd64] https://download.docker.com/linux/debian stretch stableHowever, when apt is told to use a cache server, it would fail to download Docker’ packages:
# apt-get update
[...]
W: Failed to fetch https://download.docker.com/linux/debian/dists/stretch/InRelease  Invalid response from proxy: HTTP/1.0 403 CONNECT denied (ask the admin to allow HTTPS tunnels)     [IP: 1.2.3.4 3142]
W: Some index files failed to download. They have been ignored, or old ones used instead.
Let’s fix that using the following workaround:
0. Assumptions
- There is an
apt-cacher-ngrunning athttp://apt.cache:3142. apt.cacheresolves to1.2.3.4.- There is a client configured to use the cache server, e.g.
/etc/apt/apt.conf.d/02proxysays:
Acquire::http { Proxy "http://apt.cache:3142"; }1. Create a mock DNS for the cache server
You need to create a pseudo domain name that points to the cache server. This name will then tell the cache server which target repository to access.
Let’s say we’re using docker.cache.
You can either create a proper DNS record, or just add a line to the client’s /etc/hosts file:
1.2.3.4 apt.cache docker.cacheNow, both apt.cache and docker.cache will resolve to 1.2.3.4 at the client.
2. Update the client’s repository entry
Instead of contacting the repository directly, the client should now connect to the cache server instead.
You need to change the contents in /etc/apt/sources.list.d/docker.list to:
deb http://docker.cache stretch stableThus, the client now treats the cache server as a proper repository!
3. Inform the cache server
The apt-cacher-ng of course needs to be told what to do, when clients want to access something from docker.cache: It should forward the request to the original repository!
This is called remapping. First create a file /etc/apt-cacher-ng/backends_docker_com at the server containing the link to the original repository:
https://download.docker.com/linux/debianThen, populate the remapping rule in /etc/apt-cacher-ng/acng.conf. You will find a section of Remap entries (see default config of acng.conf). Just append your rule:
Remap-dockercom: http://docker.cache ; file:backends_docker_comThis line reads:
- There is a remap rule called
Remap-dockercom - which remaps requests for
http://docker.cache - to whatever is written in file
backends_docker_com
That’s it. Restart the cache server and give it a try :)
4. Add more Remaps
If you want to use more repositories through https://, just create further mock-DNS-entries and append corresponding remapping rules to the acng.conf. Pretty easy..
The Improvements
This setup of course strips the encryption off apt calls. Granted, it’s just the connections in your own environment, but still not really elegant.. So the goal is to also encrypt the traffic between client and cache server.
There is apparently no support for TLS in apt-cacher-ng, but you can still configure an Nginx proxy (or what ever proxy you find handy) at the cache server, which supports TLS and just forwards requests to the upstream apt-cacher-ng at the same machine. Or you could setup an stunnel.
Supplemental
There are a few other workarounds for this issue available. Most of them just show how to circumvent caching for HTTPS repositories (which somehow reduces the cache server to absurdity). Here, I just documented the (in my eyes) cleanest solution.
Programmatically Obtain Shortcut Icons
February 28th, 2019For a side project, I just needed to download the favicons of brands to visually augment a web portal :)
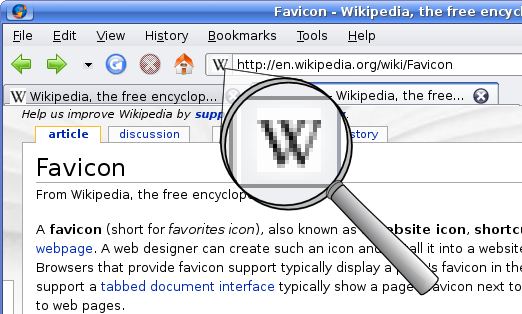
Historically, that icon was named favicon.ico, and stored in the root directory of the website.
However, nowadays the icon is typically called shortcut icon, and there are tons of options on how to get it into the browers’ tab pane…
Very rarely it’s still named favicon.ico.
It’s often not even an ICO file, but a PNG image or an SVG graph.
And developers often refer to it from within a webpage’s HTML code using a <link ...> tag.
However, it’s pretty convinient to create a link to a brand as it properly resembles the brand’s official log!
Of course, downloading the remote web page, parsing the HTML code, and selecting the correct short cut icon (if any, otherwise falling back to $domain/favicon.ico including error handling etc) would be pretty expensive and error-prone.
In such cases it’s always good to outsource the job to someone who’s doing that anyway for their business..
And lucky us *hrumph* there is Google! ;-)
Google Shares Stuff
Google provides a Shared Stuff (s2) link to automatically retrieve the favicon image of any website. The syntax is:
https://www.google.com/s2/favicons?domain=twitter.com
Thus, the GET parameter domain carries the domain of the site of interest (here it’s twitter.com).
Pretty straight forward, isn’t it?
As a bonus, you’ll get a small PHP function to download the icon and store it on your disk:
function get_favicon ($url) {

    $domain = parse_url($url)['host'];
    $filepath = CACHE_DIR . "/" . sha1 ($domain);

    if (!file_exists ($filepath))
        file_put_contents ($filepath,
            file_get_contents ('https://www.google.com/s2/favicons?domain=' . $domain));

    return $filepath;
}
This will retrieve the favicon for $url, store it in CACHE_DIR, and return the path to the stored file (the file name being the sha1 hash of the domain).
Just make sure you defined CACHE_DIR and enjoy your icons :)
Alternatives
So I heard you don’t like Google?
There is at least one alternative: https://api.faviconkit.com/twitter.com/144.
There is also PHP tool for that, if you want to self-host such a tool: https://github.com/ao/favicons.
Run your Private Firefox Sync Server
January 4th, 2019As I’m working on multiple machines (two desks at work, one desk at home, laptop, …) I’ve always been looking for a way to sync my browsers… Of course, I knew about Firefox’ sync, but I obviously don’t want to store my private browsing data in Mozilla’s cloud! Every once in a while I stumbled upon articles and posts suggesting to run a private syncserver. However, every time when looking into that project it left an uncomfortable impression: (i) you need to manually compile some 3rd party software, (ii) the whole thing seems very complex/unclean, as it requires an account server and a sync server and may work with Mozilla’s account server (but how?), and (iii) the sync project was once already abandoned (Firefox Weave was discontinued because too complex and unreliable)… Therefore, I never dared to give it a try.
Today, when I’ve again been frustrated with that fragmented situation, I saw that Mozilla’s syncserver sources contain a Dockerfile! It probably has been there for ages, but I never recognised it.. Even if that project may be a mess, in a container environment it’s pretty easy to give it a try (and clean it, if unsatisfied)! That changes everything! :P
So I changed everything, and tooted about it. Various people then convinced me to write this article. And I also learnt that Epiphany can do Firefox’ sync out of the box!
Get the Syncserver Running
Running your own syncserver using Docker is pretty straight forward. This how-to is based on the project’s readme at GitHub:mozilla-services/syncserver, but I’m using docker-compose and I deployed the service behind an Nginx proxy. You can of course skip the proxy settings and have it run locally or something.
Get the Code
Just clone the sources from GitHub:
git clone https://github.com/mozilla-services/syncserverYou should now see a new directory syncserver containing all the sources, including a Dockerfile.
Build a Docker Image
Change into the project’s directory, that contains the Dockerfile and build a new Docker image using:
docker build -t syncserver:latest .That will take a while, but when it’s finished you’ll find a new image (double check with docker images).
The provided Dockerfile is basically sufficient, but in my scenario I also need to properly declare an exposed port. So I edited that file and added
EXPOSE 5000See also the diff of my commit.
I decided to take port 5000, as the user running the syncserver is unpriviledged (so :80 and :443 are not an option) and :5000 is the example in the project’s readme ;-)
Create a Docker-Compose Configuration
Docker-Compose makes it easier to assemble and handle multiple containers in a medium complex environment.
My compose config looks like this:
firefox-sync:
  restart: always
  image: syncserver:latest
  container_name: firefox-sync
  volumes:
    - /path/to/mozilla-sync/share:/syncshare
  environment:
    - SYNCSERVER_PUBLIC_URL=https://firefox-sync.example.com
    - SYNCSERVER_SECRET=waitis6eexeeda7ifoolitauv2Aehooxie8eim2quaiyiaXeer
    - SYNCSERVER_SQLURI=sqlite:////syncshare/syncserver.db
    - SYNCSERVER_BATCH_UPLOAD_ENABLED=true
    - SYNCSERVER_FORCE_WSGI_ENVIRON=true
    - PORT=5000
    - VIRTUAL_HOST=firefox-sync.example.com
    - VIRTUAL_PORT=5000
    - HTTPS_METHOD=noredirect
  logging:
    driver: syslog
    options:
      tag: docker/web/firefoxsync
This snippet encodes for a container named firefox-sync, which is based on the image syncserver:latest.
It mounts the host’s directory /path/to/mozilla-sync/share into the container as /syncshare (I’d like to store my stuff outside of the container).
In addition it declares some environment:
SYNCSERVER_PUBLIC_URLtells the service the actual URL to your instance.SYNCSERVER_SECRETshould be complicated as it is used to generate internal certificates and stuff.SYNCSERVER_SQLURItell the service which database to use. I point it to the directory (/syncshare) that was mounted into the container, so it will actually store the database on the host.SYNCSERVER_BATCH_UPLOAD_ENABLEDis, if I understand correctly, an option to allow for uploading everything immediately…?SYNCSERVER_FORCE_WSGI_ENVIRONmust be set to true, ifSYNCSERVER_PUBLIC_URLdoesn’t match the actual URL seen by the python tool. In my case, I would connect toSYNCSERVER_PUBLIC_URL, which is however the Nginx proxy, which forwards the traffic to the syncserver. However, the syncserver will see a different request (e.g. it’s internally nothttpsanymore) and complain.
The last two variables (VIRTUAL_HOST and VIRTUAL_PORT) just configure the reverse proxy that I’m using.
Feel free to drop these lines if you want to expose the service directly to the network, but then you need to add a port forwarding for that container, such as
ports:
  - "80:5000"
which forwards traffic at your machine’s HTTP port (:80, use a different port if you’re already running a web server) to the service’s port in the container (:5000).
If you have a porper Docker-Compose configuration, just run
docker-compose up -d --remove-orphansto start the service.
Et voilà, you should be able to access the service at the configured SYNCSERVER_PUBLIC_URL :)
Configure Firefox to use your Private Sync Server
First make sure you’re signed out in the browser!
That means, about:preferences#sync should not show your identity and instead provide a button to sign in.
Then, open about:config and search for identity.sync.tokenserver.uri.
By default, it will be set to Mozilla’s sync server https://token.services.mozilla.com/1.0/sync/1.5.
Edit that field and point it to your SYNCSERVER_PUBLIC_URL plus /token/1.0/sync/1.5.
Thus, in our example above I’d set it to https://firefox-sync.example.com/token/1.0/sync/1.5.
Now go back to about:preferences#sync and sign in with your Mozilla account.
Yes, correct. You still need an account at Mozilla!
But that is just for authentication…
There is an option to also run a private account server (see Run your own Firefox Accounts Server), but that’s even more complicated.
And as I need a Mozilla account anyway to develop my AddOns, I skipped that additional hassling..
Open Issues and Troubleshooting
There are still a few issues with different clients. For example, I don’t know how to tell Epiphany to use my private syncserver instead of Mozilla’s public instance.. In addition, there is apparently no Firefox in the F-Droid repository, that properly supports sync…
For general debugging and troubleshooting, search engines are a good start..
In addition, I learnt that there is about:sync-log, which contains very detailed error messages in case of problems.
Eventually…
… I got my sync! #hooray
It’s still crisply and I didn’t test it too much, but so far it’s looking pretty good.
Mount multiple subvolumes of a LUKS encrypted BTRFS through pam_mount
November 28th, 2018Some days ago, @daftaupe@mamot.fr convinced me on Mastodon to give BTRFS a try. That’s actually been a feature on my list for some time already, and now that I need to switch PCs at work I’m going for it. However, this post wouldn’t exist if everything went straight forward.. ;-)
The Scenario
I have a 1TB SSD that I want to encrypt. It should automatically get decrypted and mounted to certain places when I log in. pam_mount can do that for you, and I’ve already been using that a lot in different scenarios. However, with BTRFS it’s a bit different. With any other file systems you would create a partition on the hard drive, which is then LUKS encrypted. This has the drawback, that you need to decide on the partition’s size beforehand!
With BTRFS you can just encrypt the whole drive and use so-called subvolumes on top of it. Thus, you’re a bit more flexible by creating and adjusting quotas as required at any point in time (if at all…), but (or and!) the subvolumes are not visible unless the device is decrypted.
Let’s have a look into that and create the scenario.
I assume that the SSD is available as /dev/sdb.
Then we can create an encrypted container using LUKS:
root@srv ~ # cryptsetup -y -v --cipher aes-xts-plain64 --key-size 256 --hash sha256 luksFormat /dev/sdb

WARNING!
========
This will overwrite data on /dev/sdb irrevocably.

Are you sure? (Type uppercase yes): YES
Enter passphrase for /dev/sdb: ****
Verify passphrase: ****
Key slot 0 created.
Command successful.
You’re not sure which cipher or key-size to choose?
Just run cryptsetup benchmark to see which settings perform best for you.
My CPU, for example, comes with hardware support for AES, thus the AES ciphers show a significantly higher throughput.
If you’re still feeling uncompfortable with that step, I recommend reading the sophisticated article at the
ArchLinux’ wiki on dm-crypt/Device encryption.
We can now open the encrypted device using
root@srv ~ # cryptsetup luksOpen /dev/sdb mydrive
Enter passphrase for /dev/sdb: ****
This will create a node in /dev/mapper/mydrive, which represents the decrypted device.
Next, we’ll create a BTRFS on that device:
root@srv ~ # mkfs.btrfs /dev/mapper/mydrive
btrfs-progs v4.17
See http://btrfs.wiki.kernel.org for more information.

Detected a SSD, turning off metadata duplication.  Mkfs with -m dup if you want to force metadata duplication.
Label:              home
UUID:               d1e1e1f9-7273-4b29-ae43-4b9ca411c2ba
Node size:          16384
Sector size:        4096
Filesystem size:    931.51GiB
Block group profiles:
Data:             single            8.00MiB
Metadata:         single            8.00MiB
System:           single            4.00MiB
SSD detected:       yes
Incompat features:  extref, skinny-metadata
Number of devices:  1
Devices:
ID        SIZE  PATH
1   931.51GiB  /dev/mapper/mydrive
That’s indeed super fast, isn’t it!? I also couldn’t believe it.. ;-)
We can now mount the device, for example to /mnt/mountain:
root@srv ~ # mount /dev/mapper/mydrive /mnt/mountain
root@srv ~ # cd /mnt/mountain
So far, the file system is completely empty.
But as it’s a BTRFS, we can create some subvolumes.
Let’s say, we want to create a volume for our $HOME, and as we’re developing this website, we also want to create a volume called www:
root@srv /mnt/mountain # btrfs subvolume create home
Create subvolume './home'

root@srv /mnt/mountain # btrfs subvolume create www
Create subvolume './www'

root@srv /mnt/mountain # btrfs subvolume list .
ID 258 gen 21 top level 5 path home
ID 259 gen 22 top level 5 path www
So we have two subvolumes in that file system: home (id 258) and www (id 259).
We could now mount them with
root@srv ~ # mount -o subvol=/home /dev/mapper/mydrive  /home/user
root@srv ~ # mount -o subvol=/www  /dev/mapper/mydrive  /var/www
But we want the system to do it automatically for us, as we login.
So unmount everything and close the LUKS container:
root@srv ~ # umount /mnt/mountain /home/user /var/www
root@srv ~ # cryptsetup luksClose mydrive
PamMount can Decrypt and Mount Automatically
I’m using pam_mount already for ages! It is super convenient.
To get your home automatically decrypted and mounted, you would just need to add the following lines to your /etc/security/pam_mount.conf.xml:
<volume path="/dev/disk/by-uuid/a1b20e2f-049c-4e5f-89be-2fc0fa3dd564" user="YOU"
        mountpoint="/home/user" options="defaults,noatime,compress,subvol=/home" />

<volume path="/dev/disk/by-uuid/a1b20e2f-049c-4e5f-89be-2fc0fa3dd564" user="YOU"
        mountpoint="/var/www" options="defaults,noatime,compress,subvol=/www" />
Given this, PAM tries to mount the respective subvolumes of the disk (identified by the UUID a1b20e2f-049c-...) to /home/user and /var/www as soon as YOU logs in.
Here, I am using UUIDs to identify the disks.
You can still use /dev/sdb (or similar), but there is a chance, that the disks are recognised in a different sequence with the next boot (and /dev/sdb may become /dev/sdc or something…).
Plus, the UUID is invariant to the system – you can put the disk in any other machine and it will have the same UUID.
To find the UUID of your disk you can use blkid:
root@srv ~ # blkid
[...]
/dev/sdb: UUID="a1b20e2f-049c-4e5f-89be-2fc0fa3dd564" TYPE="crypto_LUKS"
[...]
The Problem
As said above, with BTRFS you’ll have your partitions (called subvolumes) right in the filesystem – invisible unless decrypted.
So, what is PAM doing?
It discovers the first entry in the pam_mount.conf.xml configuration, which basically says
mount
a1b20e2f-049c-...with some extra options to/home/userwhenYOUlogs in
PAM is also smart enough to understand that a1b20e2f-049c-... is a LUKS encrypted device and it decrypts it using your login password.
This will then create a node in /dev/mapper/_dev_sdb, representing the decrypted device.
And eventually, PAM mounts /dev/mapper/_dev_sdb to /home/user.
So far so perfect.
But as soon as PAM discovers the second entry, it tries to do the same!
Again it detects a LUKS device and tries to decrypt that.
But unfortunately, there is already /dev/mapper/_dev_sdb!?
Thus, opening the LUKS drive fails and you’ll find something like that in your /var/log/auth.log:
(mount.c:72): Messages from underlying mount program:
(mount.c:76): crypt_activate_by_passphrase: File exists
(pam_mount.c:522): mount of /dev/disk/by-uuid/a1b20e2f-049c-... failed
First it seems annoying that it doesn’t work out of the box, but at least it sounds reasonable that PAM cannot do what you what it to do..
The Solution
… is quite easy, even though it took me a while to figure things out…
As soon as the first subvolume is mounted (and the device is decrypted and available through /dev/mapper/_dev_sdb), we have direct access to the file system!
Thus, we do not neet to tell PAM to mount /dev/disk/by-uuid/a1b20e2f-049c-..., but we can use /dev/mapper/_dev_sdb.
Or even better, we can use the file system’s UUID now, to become invariant to the sdb-variable.
If you run blkid with the device being decrypted you’ll find an entry like this:
root@srv ~ # blkid
[...]
/dev/sdb: UUID="a1b20e2f-049c-..." TYPE="crypto_LUKS"
/dev/mapper/_dev_sdb: UUID="d1e1e1f9-7273-..." UUID_SUB="..." TYPE="btrfs"
[...]
You see, the new node /dev/mapper/_dev_sdb also carries a UUID, actually representing the BTRFS :)
This UUID was by the way also reported by the mkfs.btrfs call above.
What does that mean for our setup? When we first need a subvolume of an encrypted drive we need to use the UUID of the parent LUKS container. For every subsequent subvolume we can use the UUID of the internal FS.
Transferred to the above scenario, we’d create a /etc/security/pam_mount.conf.xml like that:
<?xml version="1.0" encoding="utf-8" ?>
<!DOCTYPE pam_mount SYSTEM "pam_mount.conf.xml.dtd">
<pam_mount>

  <volume path="/dev/disk/by-uuid/a1b20e2f-049c-4e5f-89be-2fc0fa3dd564" user="YOU"
          mountpoint="/home/user" options="defaults,noatime,subvol=/home" />

  <volume path="/dev/disk/by-uuid/d1e1e1f9-7273-4b29-ae43-4b9ca411c2ba" user="YOU"
          mountpoint="/var/www" options="defaults,noatime,subvol=/www" />

  <mkmountpoint enable="1" remove="true" />

</pam_mount>
Note the different UUIDs? Even though both mounts origin from the same FS :)
Open Problems
Actually, I wanted to have my home in a raid of two devices, but I don’t know how to tell pam_mount to decrypt two devices to make BTRFS handle the raid..?
The only option seems to use mdadm to create the raid, but then BTRFS just sees a single device and, therefore, cannot do its extra raid magic…
If anyone has an idea on that issue you’ll have my ears :)