binfalse
Hacking Havag
August 9th, 2011Ihr kennt vielleicht die Havag (Hallesche Verkehrs-AG)? Das ist das Verkehrsunternehmen in Halle, befördert uns zu maximalen Preisen bei dürftiger Qualität. Wie auch immer.
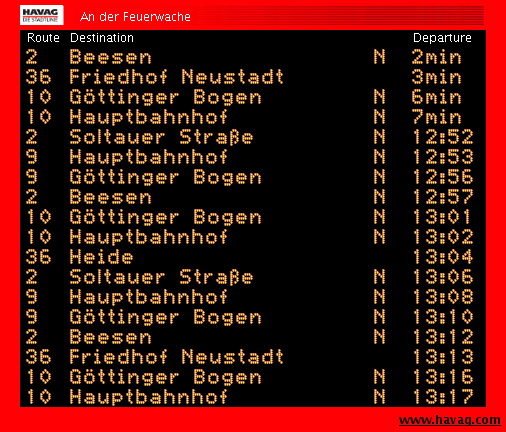
Das Unternehmen bietet seinen Kunden ein Widget an, mit dem man vom Wohnzimmer das Eintreffen der Bahnen an der nächstgelegenen Haltestelle monitoren kann. Das ganze nennt sich mobile@home (siehe Bild 1) und ist in Java geschrieben. Ist eigentlich eine feine Sache, man muss nicht mehr nach Bauchgefühl das Haus verlassen, wenn ja doch gerade keine Bahn kommt. Das Fenster nervt jedoch tierisch. Ich hab seit langen auf meinem Schedule einen Eintrag, der mich daran erinnert eine bessere Lösung zu finden. Heute Nacht hab ich mich nun endlich an die Arbeit gemacht.
Das Problem ist wie üblich eine geschlossene Software, keine Dokumentation für jemanden wie mich. Ja es ist Java, also wäre es ein Leichtes die Binaries zu dekompilieren, deren Projekt besteht jedoch aus >1000 Klassen (öhm overhead!) und über den rechtlichen Aspekt bin ich mir da auch nicht sicher.
Aber was wird das Tool wohl machen? Es wird einen zentralen Server nach den nächsten Stopps an einer von mir gewählten Haltestelle fragen. Der Server wird dann sicherlich mit den jeweiligen Bahnen antworten.
Soweit Client und Server kein kryptisches Protokoll sprechen kann ich also einfach den Netzwerkverkehr der über meine Interfaces geht mitschneiden und nachbauen. Also fix den Sniffer meines Vertrauens und das tolle Tool gestartet. Schnell wurde klar um welchen Server es sich handelt: 83.221.237.42 auf Port 20010 . Und die Sache war auch schon so gut wie gegessen als ich folgende Pakete an mir vorbei rauschen sah:
usr@srv % tcpdump -A -n src 83.221.237.42 or dst 83.221.237.42 and tcp port 20010
[...]
03:19:29.177630 IP 192.168.9.55.39453 > 83.221.237.42.20010: Flags [P.], seq 231:443, ack 108, win 35, options [nop,nop,TS val 28628068 ecr 367433884], length 212
E....2@.@.....  7S..*..N*..["..:~...#.......
...d....POST /init/rtpi HTTP/1.1
Content-Type: text/xml
User-Agent: Java/1.6.0_26
Host: 83.221.237.42:20010
Accept: text/html, image/gif, image/jpeg, *; q=.2, */*; q=.2
Connection: keep-alive
Content-Length: 47


03:19:29.177676 IP 192.168.9.55.39453 > 83.221.237.42.20010: Flags [P.], seq 443:490, ack 108, win 35, options [nop,nop,TS val 28628068 ecr 367433884], length 47
E..c.3@.@..z..  7S..*..N*..[...:~...#.=.....
...d....c..m..getDeparturesForStopS..An der Feuerwachez
03:19:29.229795 IP 83.221.237.42.20010 > 192.168.9.55.39453: Flags [.], ack 490, win 65488, options [nop,nop,TS val 367433990 ecr 28628068], length 0
E..4..@.r.}.S..*..      7N*....:~..\\%....s......
.......d
03:19:29.234736 IP 83.221.237.42.20010 > 192.168.9.55.39453: Flags [.], seq 108:1556, ack 490, win 65535, options [nop,nop,TS val 367433992 ecr 28628068], length 1448
E.....@.r.x1S..*..      7N*....:~..\\%....h......
.......dHTTP/1.1 200 OK
Server: Apache-Coyote/1.1
Content-Length: 1869
Date: Tue, 09 Aug 2011 01:19:29 GMT

S..9S..Soltauer Stra..eS..2011.08.09.03:46:00S..2011.08.09.03:46:00S..trueS..38150S..651S..falseS..falseS..38150:12840S..A FeuerwacheS..falseS..falsezVt..[stringl...l...ingl...
[...]
An der Feuerwache ist die Haltestelle, für die meine Anfrage raus ging, und ein POST -connect mit den Daten ...d....c..m..getDeparturesForStopS..An der Feuerwachez sieht stark nach dem aus, was ich gesucht habe. Kurz darauf kommt auch gleich die Antwort S..9S..Soltauer Stra..eS..2011.08.09.03:46:00S..2011.08.09.03:46:00S..true[..] , und tatsächlich fährt eine Linie 9 in kürze zur Soltauer Straße . Dedüm!!
Der Rest ist simpel. Nur noch mit ‘nem Hexeditor (ich empfehle hexcurse) in die Pakete hinein geschaut um zu sehen was genau übermittelt werden muss (die . zwischen den Daten stehen für Zeichen, die in meinem Terminal nicht für mich sichtbar dargestellt werden können. Deren Hexadezimal-Code gibt aber Aufschluss über ihren Wert). Mit ein wenig Trial&Error ist die Geschichte vom Tisch.
Natürlich ist meine Alternative zu dem Widget für jedermann verfügbar:
Als Argument einfach die gewünschte Haltestelle angeben:
usr@srv % ./havag.pl Straßburger Weg
Frage http://83.221.237.42:20010/init/rtpi nach geplanten Stops für 'Straßburger Weg'...

 Zeit   Linie   Richtung
15:33       4   Kröllwitz
15:36       5   Bad Dürrenberg
15:42       5   Kröllwitz
15:44       S   Sonderfahrt
15:45       4   Hauptbahnhof
15:48       4   Kröllwitz
15:51       5   Ammendorf
15:57       5   Kröllwitz
16:00       4   Hauptbahnhof
16:03       4   Kröllwitz
16:06       5   Bad Dürrenberg
16:12       5   Kröllwitz
16:15       4   Hauptbahnhof
16:18       4   Kröllwitz
16:21       5   Ammendorf
16:27       5   Kröllwitz
16:30       4   Hauptbahnhof
Das Protokoll
Vielleicht hat ja jemand Lust weitere Tools zu schreiben, die die “Serverschnittstelle” der Havag benutzen. Daher hier eine kurze Dokumentation des inoffiziellen Protokolls, das mit dem Server gesprochen werden kann.
Eine Anfrage an den Server muss via HTTP-POST an 83.221.237.42:20010/init/rtpi geschehen und die folgenden Inhalte liefern:
[COMMAND]x00[LEN][FUNCTION]x00[LEN][FUNCTIONNAME]x53x00[LEN][ARGUMENT]x7AHierbei ist xAB das Zeichen für den Hexwert AB , LEN ist die Länge der darauf folgenden Zeichenkette. Um den Server nach den nächsten Stopps am Rennbahnkreuz zu fragen sendet man als Kommando ein c , als Funktion ein m , und die Funktion heißt getDeparturesForStop . Als Argument wird dann die Haltestelle erwartet. Die Anfrage in HalbHex sieht also wie folgt aus:
cx00x01mx00x14getDeparturesForStopx53x00x0dRennbahnkreuzx7aund komplett Hexadezimal-kodiert:
x63x00x01x6dx00x14x67x65x74x44x65x70x61x72x74x75x72x65x73x46x6fx72x53x74x6fx70x53x00x0dx52x65x6ex6ex62x61x68x6ex6bx72x65x75x7ax7aAls Antwort bekommt man die Abfahrtszeiten in den nächsten 60 min. Die Antwort beginnt mit einer Zeichenkette die ich nicht verstehe und vorerst nur verwerfe. Ein Eintrag für eine Bahn startet mit den Hexadezimalwerten x56x74x00x07x5Cx5Bx73x74x72x69x6Ex67x6Cx00x00x00x0D . Darauf folgen die einzelnen Informationen zu dieser Bahn. Eine einzelne Information ist wie folgt kodiert:
x53x00[LEN][INFO]LEN gibt hier wieder die Länge der folgenden Information an, die Information selbst ist ASCII Klartext. Ein Bahneintrag wird abgeschlossen mit einem x7a (z). Folgende Daten werden übermittelt:
Linie   Endstation      Ankunft                 ???                     N       ???     ???     ???     ???     ???             Angefragte Haltestelle  ???     ???  z
91      Am Steintor     2011.08.09.02:42:35     2011.08.09.01:13:00     false   18824   0       false   false   18824:90120     An der Feuerwache       false   falsez
Das boolsche N gibt an, ob es sich um eine Niederflur-Straßenbahn handelt. Die mit ??? gekennzeichneten Felder verstehe ich (noch) nicht. Vielleicht etwas wie Wagennummer/Typ, ob es eine Verspätung gibt etc. Kann man sicher auch herausbekommen, da sie aber für mich vorerst nicht wichtig sind habe ich mich nicht weiter darum gekümmert.
Meine Beschreibungen sind natürlich alles andere als komplett, für die Korrektheit kann ich auch nicht garantieren. Vielleicht gehört das x00 vor der Längen-Kodierung auch mit zur Längenangabe und ist bei den kurzen Zeichenketten nur immer 0? Wer weiß, in der Praxis funktioniert mein Gehacktes aber (mindestens für mich) ;-)
Update:
Wird getDeparturesForStop ohne Argumente gesendet, bekommt man eine Antwort mit allen Verfügbaren Stopps. (via @michas)
Damit ist also der Weg für coole neue Apps geebnet. Vielleicht hat ja jemand von euch eines dieser Smartphones (oder es findet sich ein Sponsor der mir eines zur Verfügung stellt)?
Übrigens flogen auch hin und wieder Pakete mit Inhalten wie diesem vorbei: Apache Tomcat/5.5.17 - Error report . Spricht nicht gerade für das Widget. :-P
WordPress WordCloud with R
August 3rd, 2011These days one can frequently read about wordclouds created with R, initiated by the release of the wordcloud package by Ian Fellows on July 23rd. So here I am to put in my two cents.
I thought about creating a wordcloud of a complete blog history, so I build a script that connects to a MySQL database and grabs all published posts and pages. All articles are combined in an huge text, that, when purged from tags and special chars, is visualized as a wordcloud:
[cc lang=”rsplus” lines=”-1” file=”pipapo/R/wordpress-wordcloud.R”][/cc]
Enough code, here is the result for my slight blog:

Smart image, isn’t it? Unfortunately it takes about 30 secs to generate it, otherwise it would be cool to create such a cloud live, for example using rApache.
Installing an HP ProLiant
August 1st, 2011I just installed a new server from HP, a ProLiant DL180 G6. Here are some notes about the setup.
To check the hardware status you need to install the ProLiant Support Package. Running a Debian/Ubuntu you should import the HP PSP mirror in your sources.list . It can be found here, you might include something like:
deb http://downloads.linux.hp.com/SDR/downloads/proliantsupportpack/Debian stable current/non-freeAfter an aptitude update you’ll find some new packages. I recommend to install hpaclui to speak to your raid-controllers and hp-health to interact with your hardware.
With hpaclui you can ask the raid-controllers for some information:
usr@srv % hpacucli ctrl all show status

Smart Array P123 in Slot 1
   Controller Status: OK
   Cache Status: OK
   Battery/Capacitor Status: OK

usr@srv % hpacucli ctrl slot=1 show config

Smart Array P123 in Slot 1                (sn: SOMESN  )

   array A (SAS, Unused Space: 0 MB)


      logicaldrive 1 (99.99 GB, RAID 1, OK)

      physicaldrive 1I:1:1 (port 1I:box 1:bay 1, SAS, 99 GB, OK)
      physicaldrive 1I:1:2 (port 1I:box 1:bay 2, SAS, 99 GB, OK)
      [...]

   array B (SAS, Unused Space: 0 MB)


      logicaldrive 2 (99.99 TB, RAID 5, OK)

      physicaldrive 1I:1:3 (port 1I:box 1:bay 3, SAS, 99 TB, OK)
      physicaldrive 1I:1:4 (port 1I:box 1:bay 4, SAS, 99 TB, OK)
      [...]

   Expander 250 (WWID: SOMESN, Port: 1I, Box: 1)

   Enclosure SEP (Vendor ID HP, Model SOMEMD) 248 (WWID: SOMESN, Port: 1I, Box: 1)

   SEP (Vendor ID SOMEVNDR, Model  SOMEMD) 249 (WWID: SOMESN)
So you get an idea of your storage.
The hp-health packages comes with a tool called hpasmcli . It’s used to query all the hardware states:
usr@srv % hpasmcli -s "SHOW"

Invalid Arguments
         SHOW ASR
         SHOW DIMM
         SHOW FANS
         SHOW HT
         SHOW NAME
         SHOW PORTMAP
         SHOW POWERMETER
         SHOW POWERSUPPLY
         SHOW SEL
         SHOW SERVER
         SHOW TEMP
         SHOW TPM
         SHOW UID

usr@srv % hpasmcli -s "SHOW POWERSUPPLY"

Power supply #1
        Present  : Yes
        Redundant: Yes
        Condition: Ok
        Hotplug  : Not supported
Power supply #2
        Present  : Yes
        Redundant: Yes
        Condition: Ok
        Hotplug  : Not supported
Both tools are very easy to use and give a great overview about the health. So I immediately developed a monitoring plugin that parses the output of those runs. I came to the point, that I wasn’t able to find some documentation about the hpasmcli tool. Most of its output was clear, but I don’t know what happens if a fan breaks. The output with working fans looks like:
usr@srv % hpasmcli -s "SHOW FANS"

Fan  Location        Present Speed  of max  Redundant  Partner  Hot-pluggable
---  --------        ------- -----  ------  ---------  -------  -------------
#1   SYSTEM          Yes     NORMAL  45%     Yes        0        No
#2   SYSTEM          Yes     NORMAL  43%     Yes        0        No
#3   SYSTEM          Yes     HIGH    100%    Yes        0        No
#4   SYSTEM          Yes     HIGH    100%    Yes        0        No
#5   SYSTEM          Yes     NORMAL  22%     Yes        0        No
#6   SYSTEM          Yes     NORMAL  21%     Yes        0        No
#7   SYSTEM          Yes     NORMAL  47%     Yes        0        No
#8   SYSTEM          Yes     NORMAL  46%     Yes        0        No
So what if a fan is broken? Is it still Present and the Speed -string just changes to NONE or something like that? I send a support request to HP, but all they respond was a premium-rate number to call. Seems that my understanding of service differs from theirs. Since I don’t know how the output looks like in an error case (I don’t want to stick pencils into new machines) the plugin can’t decide whether the fans are OK. If you want to use my plugin you need to skip fan-checks until HP publishes a document with possible values.
IMHO a public tool should be open source, so I can get those information on my own, or at least well documented!
Btw. HP if you read this, please include some permanent links to your web interface ;-)
Now I'm R-Blogging
July 10th, 2011Today a lot of great mails arrived at my inbox. In one of them I was reading I’ve just added your feed to the site.
Where did this mail come from?
The sender of the email was Tal Galili. He is a researcher in BioStatistics at the Tel Aviv University, very active around the internet. He also originated R-Bloggers and in this email he told me that I’m recruited ;-)
What is R-Bloggers
R-Bloggers is an aggregation of more than 200 bloggers writing about GNU’s R and some statistics/math/hacks that can be done using R. If you didn’t heard about R-Bloggers I strongly recommend to take a look at their website. I’m following this project since a while, it’s a great fusion of brainiacs! So I’m proud to have my modest R-related articles listed between them.
Btw. if you like R-Bloggers and/or have some R experiences yet you should also take a look at the ‘R’ programming Wikibook. Contributing your knowledge is greatly appreciated!
Let’s see what the future brings, happy hacking!
Rate My Po...
July 8th, 2011…sts (of course!). Yesterday I just installed a rating plugin, inspired by these stackexchange platforms.
Searching through the WordPress plugin directory didn’t make me happy. All existing plugins lack of desired features. After some tests I decided to modify UpDownUpDown of Dave Konopka. It’s a nice plugin, but still didn’t match my criteria. For example guests were not allowed to vote, there were some XHTML bugs and I didn’t like the style. So I created a patch (it’s attached..) and sent it to Dave (I don’t yet have a github account). He told me that he’ll take a look at it and might apply it to the official plugin, so if you also want to use this rating plugin with my additional features just keep the URL in mind and watch out for a new version.
The special version I’m using here right now has of course some more slight changes, to have it perfectly matched to my own blog. So you are now able to vote for articles, positive or negative, to give me a hint what my visitors like to read ;-)
I additionally installed a further page that lists my articles sorted by votes: top. So you can get a smart overview of best/worst content.
With this in mind: Happy voting! ;-)